How to Make a Well Wishes Tree

Have you ever needed the perfect, sentimental gift for someone but didn’t know where to start? Something that really displayed your thoughts and feelings for that very special someone and that would be able to be treasured forever? You might consider making someone a well wishes tree.
The idea for a well wishes tree came about in 2010, when one of my friends received her Ph.D. A few friends and I were brainstorming on the perfect graduation gift, but came up with very few ideas. This was mostly because the recipient is a very simple, no-frills kind of person who really appreciated gifts that came from the heart, more so than any gift that could come from the store. We came up with a well wishes tree because it gave us a chance to create a little office décor she could display, while at the same time, giving us the opportunity to write down our personal sentiments in a private manner. To this day, the tree is displayed in her office, and she has said she looks to our notes when she needs a “lift” in her day.
With little to no arts and crafts acumen, these very special trees can be completely customized for any event or occasion, and with very few supplies. In fact, in just a relatively short amount of time, these special keepsakes will come alive and tell a story that will be cherished for a lifetime.
What You Will Need
- Garden pot
- Large foam ball (size will depend on the pot you choose)
- Moss or grass
- Two or three large branches (depending on how many notes you will be displaying0
- Scrapbook paper
- Paper cuter
- Hole punch
- 1/8" ribbon
How to Assemble
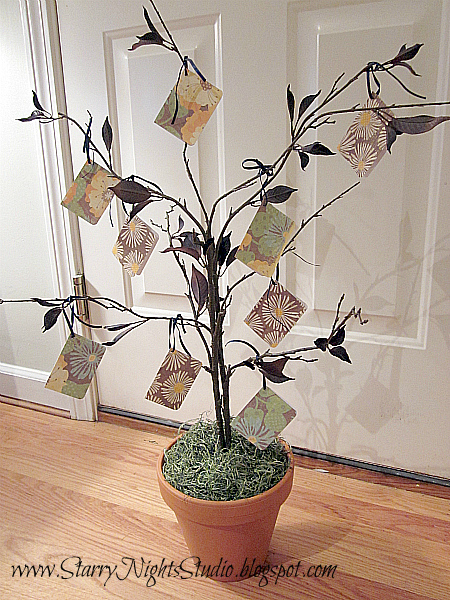
To assemble your tree, first place a large foam ball into the base of your garden pot. Make sure your foam is secure and will not move or come out easily. Place your two or three large branches into the foam ball, making sure they are in deep enough where they will not lean or fall out. (If done correctly, you should be able to move your entire pot without the branches shifting at all.) If you find that your branches are not sitting tightly together, you can use wire (preferably the color of the branches) to tie the ends together tightly. Once secure, place moss atop the foam ball, covering the foam and the bottom of your branches. You are now ready to assemble your note cards.
To make the note cards, select the scrapbook paper of your choice. You may choose to use one pattern, or have each note card be a different pattern. Cut your paper into 3x4” pieces, and score them down the center to make little cards. You can leave the corners as is, or use a corner-punch to round the edges. In the top left corner, punch a hole just large enough to insert a small 1/8” ribbon. Create a loop that is approximately 2” and tie your ends together to create a hook. Once complete, you may write your sentiments on the cards and hang them as you would ornaments on a Christmas tree.


